Featured Fly Tiers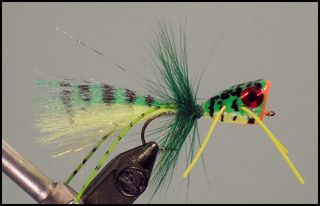 Hipp's Soft-Bodied PopperTied by Anthony Hipps Anthony Hipps ties the Soft-Bodied Popper in hook sizes 4 and 6. He uses a variety of materials for the tail and fabric paint to color the body in order to achieve various effects on this very attractive bass and panfish lure. The Soft-Bodied Popper in the tying sequence along with information provided on this page first appeared in the Summer 2006 issue of Fly Tyer Magazine. This magazine should be required reading for every serious fly tier. If you're not familiar with Fly Tyer or would like to subscribe, click on Fly Tyer Magazine. Materials List
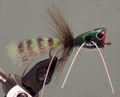
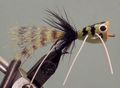
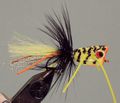
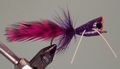
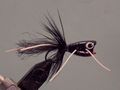
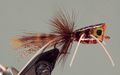
Tying NotesSoft-Bodied Poppers are much easier to build than other poppers and they are much more durable. I generally tie the Soft-Bodied Popper on either a size 4 or a size 6 kink shanked fly tying hook. The hook used in the tying sequence is a Size 4 Mustad 33903, but you could also use the Mustad CK52S of the CK74SS. It's also possible to use a straight-shanked hook by coverinig the hook's shank with a heavy layer of thread before you begin building the popper's body. To build the body I use stacked layers of white 2 mm thick foam cut from an 8 1/2 by 11 inch sheet of closed-cell craft foam that can be purchased at most craft or hobby stores.  I use regular non-adhesive foam sheets for the underbody of the popper and adhesive backed foam sheets for the outer shell. As you will see in the tying sequence, the non-adhesive sheets work best attached with super-glue, and the adhesive backed sheets work best for the outer shell. However, if you can't find adhesive backed sheets, regular non-adhesive backed foam sheets will work just fine for the entire body building process as long as you are careful with the adhesive. There are a variety of Cyanoacrylate adhesives (super-glues) on the market but I prefer the glues with brushes such as Crazy Glue or Lok-Tite. 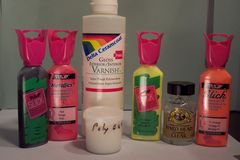 The best paint for Soft-Bodied Poppers is three-dimensional fabric paint in a squeezable plastic bottle with an applicator tip. Fabric paints can be found in most craft shops or fabric stores, and they are available in a variety of colors for a buck or so a bottle. My favorite brands are Tulip, Polymark, or Scribbles. After the soft-foam body has been painted with fabric paint, the finish coat is applied. The best finish coat is achieved with a water-based polyurethane varnish. I prefer "Gloss Exterior/Interior Varnish" manufactured by Delta Ceramcoat. If you use this varnish, thin it by combining one part water with four parts varnish in order to achieve the best result. Use your creativity when you attach the tailing materials to a Soft-Bodied Popper. Most synthetic or natural materials will work including Flashabou, Crystal Flash, Craft Fur, Calf Tail, hen or rooster feathers, deer hair or bucktail. Chicken feathers are always used for the skirt/collar. Here are some examples of Soft-Bodied Poppers that incorporate various color schemes and tailing materials.
So, in review, here are the five easy steps to building Soft-Bodied Popper. First, build the underbody using various sized strips of closed-cell foam. Second, install the closed-cell foam outer shell of the popper body to give it a popper shape. Third, paint and varnish the closed-cell foam popper body using your choice of colored fabric paints. Fourth, add the tail materials and the hackle collar. Finally, sew rubber legs through the body to give the lure additional action in the water. Tying Instructions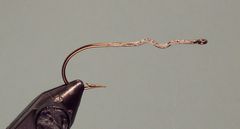 Step 1 Clamp a size 4 hook in the vice and crimp the barb. Start the thread on the hook's shank and cover the shank with thread from the hook's point to an eye widith behind the hook's eye. Let the tying thread hang at the front of the thread wraps. 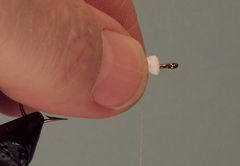 Step 2 Cut a rectangular strip of foam. This piece of foam should extend from slightly behind the hook's eye to past the kink in the hook's shank. The foam strip should be just wide enough to barely fold over the hook's shank. Coat the thread wraps with glue and fold the foam over the hook's shank. With finger and gentle thread pressure, wrap the thread back to the rear of the foam with evenly spaced wraps while simultaneosly moving your hand backward. Increase the thread pressure at the rear of the foam to securely bind the rear of the foam to the hook's shank. 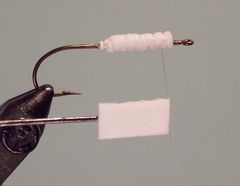 Step 2A Next, gently wrap the thread forward to the initial tie-in point. You'll repeat this procedure as you apply additional layers of foam to build the body. The photo illustrates how the underbody should appear at the end of this step. The piece of foam in the photo illustrates the size of the foam strip that was attached to the hook's shank. 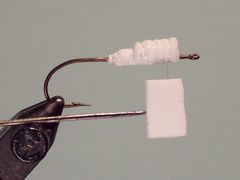 Step 3 Cut a foam strip for the second layer of foam. This pieice should be half as wide as the first layer, and like the first layer, it should just touch on the bottom of the hook. Apply adhesive and repeat the process followed in step 3 for tying this layer of foam to the body. If you are using a size 6 hook, you are finished building the underbody. Remember: two layers of foam underbody on a size 6 hook and three layers of foam underbody on a size 4 hook. 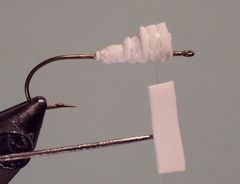 Step 4 Since we are using a size 4 hook in this tying sequence, we need to add one more layer of foam for the underbody. In this photo the foam layer has already been glued and tied to the second layer in the same manner as the other foam strips have been applied. The strip that is shown was the proper sized strip to add to the body, half as wide as the second strip. 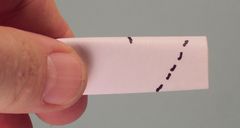 Step 5 Now it's time to build the outer shell of the popper. Use adhesive backed foam for the outer shell. Cut a square of foam that is slightly wider and slightly longer than you will need for the outer shell. Fold the sheet in half as shown. 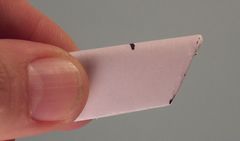 Step 6 Cut the folded foam at an angle to form the popper's face. The dotted line shows how to cut the foam at an angle. Then, hold the folded foam against the hook shank. Cut the back end of the foam so that the shell extends slightly past the underbody.  Step 7 Remove the paper backing from the foam to expose the adhesive side. Now, apply the piece of foam to the hook. Be sure to slide the shell slightly forward to form the cupped popper face. Press down on top of the shell and fold the foam completely around the underbody. Press the foam sheet firmly together on the bottom of the hook's shank. 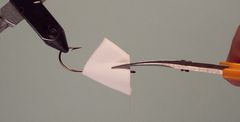 Step 8 Use your scissors to trim the excess foam flush with the bottom of the hook's shank. 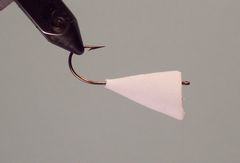 8A This is the way the popper body should look after step 8 has been completed. 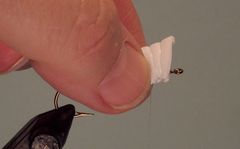 Step 9 Wrap the thread over the foam shell. Make evenly spaced wraps of thread and use just enough thread pressure to hold the foam outer shell in place. But don't compress the foam. Foam is springy and the thread holds it together and adds durability to the body. Tie the rear of the foam down hard, tie a whip finish and remove the thread. Apply adhesive to the seam along the bottom of the body and the whip finish. 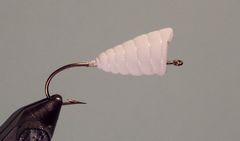 Step 9A Here is how the body should look at this point in the process. The body is now ready to be painted. 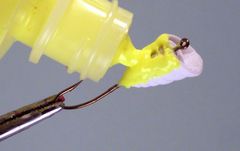 Step 10 Paint the body by squeezing paint directly and evenly from the fabric paint bottle tip. No brush is required. Completely coat the foam body. Don't worry if the paint isn't totally smooth when it's first applied. The paint will even itself out as it dries. Holding the hook in forceps makes it easier to apply the paint without getting it on your fingers. After the paint has been applied, let the paint dry for at least two hours before touching the painted surface. Step 11 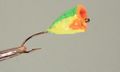 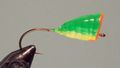 These photos show the painted popper body while the paint is still wet. It illustrates the easy use of three-dimensional fabric paint to apply multiple colors. 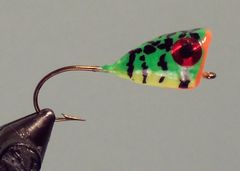 Step 12 This photo shows a completely detailed and varnished popper body. Apply eyes by using stick-on models or by painting them. Details such as stripes, spots and gills can be drawn on the painted body with a permanent marker. After all the painting and marking is finished, and the body is completely dried, it's time to apply the varnish to finish the body. Dip the popper head in a container of polyurethanne varnish. Allow the excess varnish to drip off the popper back into the container. Place the popper head on a slow rotary device to dry for ten minutes. If you don't have a rotary device put the fly back in your rotary vice and rotate the fly with it for a few minutes to begin the drying process. Be sure to thin the varnish as explained in the "Tying Notes." After the first coat of varnish has dried, dip the popper head in the varnish a second trime and place it back on the rotary device for another ten minutes or until the varnish is dry. Two or three coats of varnish are sufficient. Allow the varnish to continue drying for at least thirty minutes prior to touching the popper body. 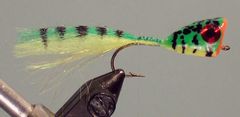 Step 13 Now it's time to build the tail. Re-attach the tying thread behind the body and tie in any synthetic or natural hair or flash material that you desire. Color the material with permanent markers if you choose. The tail should be at least as long as the hook. 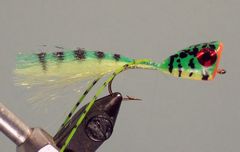 Step 14 Now attach one rubber strand on each side of the tail. The rubber strands should be slightly longer than the other materials. 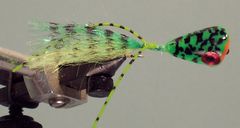 14A Here is how the popper should look after the rubber hackle has been added to each side of the tail materials. 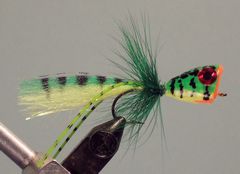 Step 15 Use an appropriately sized rooster saddle or neck hackle for the collar/skirt. Wrap the hackle for as many wraps as it takes to fill up the space between the base of the tail and the head. Tie off the thread and coat the thread wraps with head cement or super-glue. 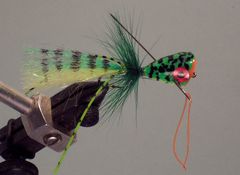 Step 16 The final step is to give your popper some rubber legs. This is easily done with a sewing needle with an eye large enough to accomodate 3/0 tying thread. Here is how you make the sewing device. Clip a three-inch piece of thread from the spool and thread it through the needle's eye. Tie both ends of the thread with a simple knot and trim the tag ends. Now, push the needle through the body at an angle as shown in the photo. 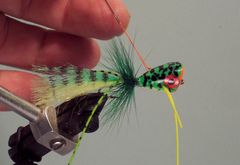 Step 17 Place the tip end of one rubber strand in the thread loop and pull the strand through the popper body so that you end up with legs of equal length on the far and near side of the body. Next, push the needle through the body, at an opposite angle to the first leg, so that the second leg will will form an "X" through the middle of the popper's body. 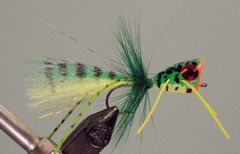 Step 18 Here is how your completed Hipp's Soft-Foam Popper should look after the rubber hackle legs have been installed.
Warmwater Fly Tyer - by Ward Bean
© Copyright 2026 Ward Bean, Council Bluffs, IA, All rights reserved. © Copyright 2026 Ward Bean, Council Bluffs, IA, All rights reserved.
|