Chuggers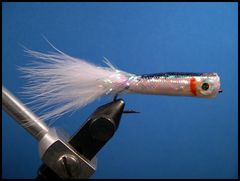 Zook's Pencil PopperIowa fly tier Lance Zook created this great little popping minnow to take Smallmouth Bass on Eastern Iowa smallmouth streams. Here is how I tie it.
Materials List
Tying NotesBuilding a Zook's Pencil Popper is fairly straight forward. However, there is a special tool required that is not normally found on your fly tying bench. That tool is a Dremel Tool to sand the foam cylinder down to a size that will fit inside the Mylar Tubing. You will also need it to make the cup in the face of the fly. You can coat the popper with Epoxy or Softex but I prefer to use Loon's Hard Head fly finish. The finish on the popper is just like an Epoxy finish except applying the Hard Head is a lot easier and less messy. Because you are building the popper instead of tying it, many of the steps in the building process are easier to perform by removing the fly from the vice. Lance Zook ties the popper in both size 4 and size 6. The fly in the tying sequence is a size 4. If you are tying the fly on a size 4 hook you should use the 3/8" dia. foam cylinder and you will have to make it slightly smaller with the Dremmel Tool to accomodate the mylar tubing. If you are tying the popper on the smaller size 6 hook you can use a 1/4" foam cylinder that will accomodate the mylar tubing without any sanding.  If you can't find foam cylinders, Ex. Large Mylar Tubing, or hooks at your local fly shop, you can purchase them from Feather-Craft Fly Fishing in St. Louis. See the "WebLinks" page. Angling Tips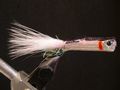 Lance says that fishing the popper is pretty straightforward. He likes to fish it in fast and choppy water to create noise for the fish to home in on. He says that it is also effective at night in both still and moving water. Fish the popper with short jerks and keep it moving as if it were a struggling or fleeing minnow. 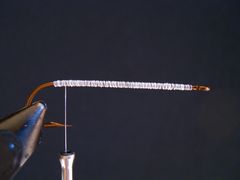 Step 1 Clamp the hook in the vice, crimp the barb, and start the thread at the hook's eye. Then cover the entire hook shank twice with thread. 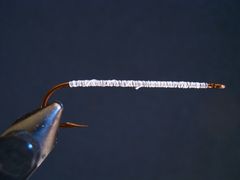 Step 2 Tie off the thread with a couple half-hitches or a whip finish and lay the thread and bobbin aside. 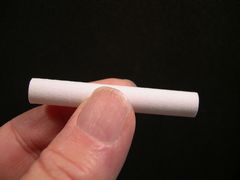 Step 3 Select an appropriately sized foam cylinder for the body. The one shown is 3/8" in circumference and will have to be slightly sanded to fit the Mylar Tubing. 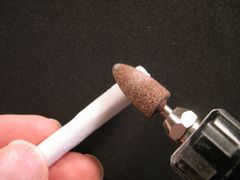 Step 4 Use your Dremel Tool to sand the foam cylinder to a proper size to fit inside the Mylar Tubing. Unfortunately, sand paper won't do the job. Borrow a Dremel Tool from one of your friends if you don't have one. Of if you're flush with cash, by your own. They are a very handy tool to have around. 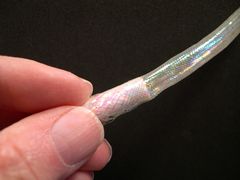 Step 5 Continue lightly sanding the cylinder until it fits snugly inside the Mylar Tubing. 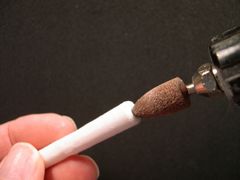 Step 6 With your Dremel Tool make a cupped face on the front of the foam cylinder. 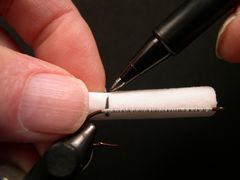 Step 7 Align the foam cylinder along the hook's shank and measure and mark it for length. The cylinder should be the length of the hook's shank from the hook's eye to the hook's bend at a point directly above the barb. 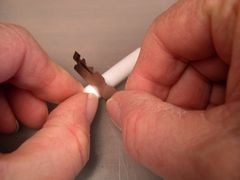 Step 8 Lay the foam cylinder on a flat surface and make a clean straight cut at the mark with a razor blade. I prefer to use one-half of a double-edge razor blade for this job. 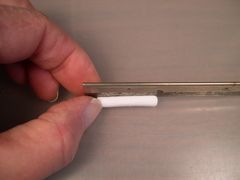 Step 9 Lay the foam cylinder on a flat surface. With a Hobby Saw or the razor blade, position the blade in the center and along the length of the cylinder and cut a slot no more than 1/4 of the way through. Here I'm using a hobby saw but the razor blade works just as well. 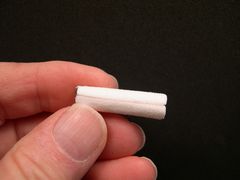 Step 10 This is how the cylinder should look after you have completed step 9 with a Hobby Saw. Notice that the slot is perfectly centered for the full length of the cylinder. If you use a razor blade, the slot is not as apparent, but with a little effort you will be able to find the slot when you install the cylinder on the hook. 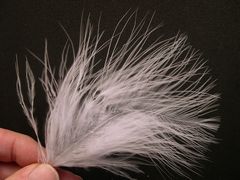 Step 11 Now that the foam body is finished, select a well formed large Marabou Blood Feather for the tail. 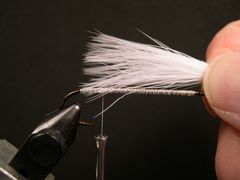 Step 12 Measure the length of the tail by holding the Marabou against the hook's shank. Once the Marabou tail is attached to the hook it should be about the length of the hook. 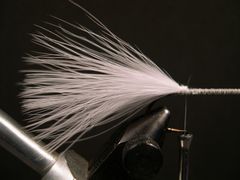 Step 13 Tie in the Marabou tail as far back on the hook's shank as possible. Tie off the thread with a couple of half-hitches or a whip finish and lay the bobbin aside. 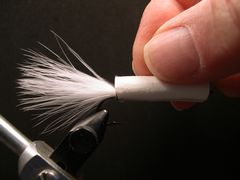 Step 14 Position the foam body along the top of the hook's shank and slide slot onto the shank. Position the body as close to the hook's eye as possible and check the front to make sure that it is centered. 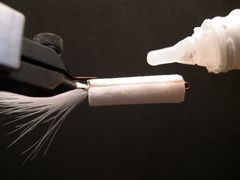 Step 15 Invert the hook and apply a coat of Zap-A-Gap or other Crazy Glue in the slot along the shank without moving the body. 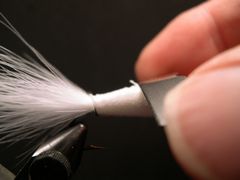 Step 16 Once the glue has dried (it takes only a few minutes) taper the back 1/3rd of the foam body towards the tail with half of a double-edged razor blade. 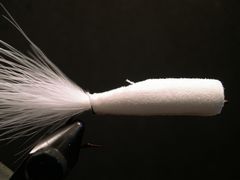 Step 17 This is the way the body should look after you have completed step 16. Smooth any rough edges with your Dremel Tool if necessary. 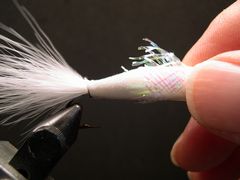 Step 18 Cut a piece of Mylar Tubing about one and one-half inches long and remove the cotton core. Slowly and gently slide the tubing over the foam body until the frayed end of the tubing covers about a third of the tail. 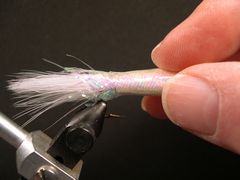 Step 19 The tubing will be fairly tight so you may have to "inch worm" it onto the body. When the tubing is in place, gently pull on both ends of the tubing to set it in place against the foam body. 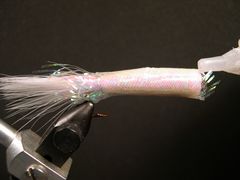 Step 20 Gently place a drop of Zap-A-Gap around the front edge of the body. It will seep through the tubing and and hold the front of the tubing in place. 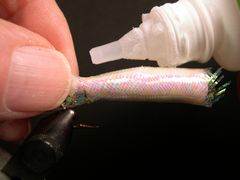 Step 21 Place a drop of glue at the rear of the foam body at the place where the mylar tubing touches the end of the foam. 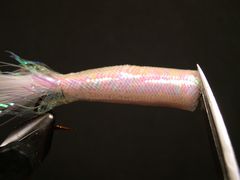 Step 22 With your scissors tips, cut the excess tubing around the front of the popper as close to the edge of the foam face as possible. 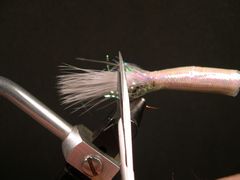 Step 23 Pick out the frayed tubing around the tail to create a skirt. The tubing should only fray as far as the glue point. Trim skirt to a length that you prefer. 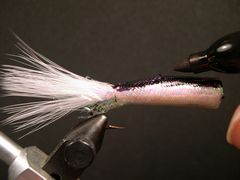 Step 24 Color the back with a black or gray marking pen. 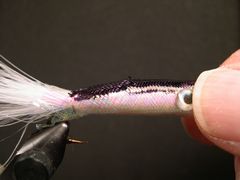 Step 25 Place the adhesive backed eyes on the body. 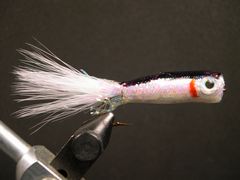 Step 26 Add the gills with a red marker. 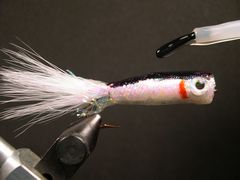 Step 27 Paint the body with a coat or two of Loon Hard Head fly finish. Be sure to let the first coat dry throughly before applying the second coat. Learn more about Loon Hard Head fly finish. 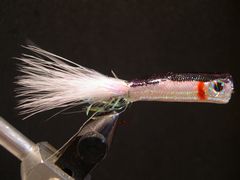 Your Zook's Pencil Popper is finished.
Warmwater Fly Tyer - by Ward Bean
© Copyright 2026 Ward Bean, Council Bluffs, IA, All rights reserved. © Copyright 2026 Ward Bean, Council Bluffs, IA, All rights reserved.
|