Swimming Flies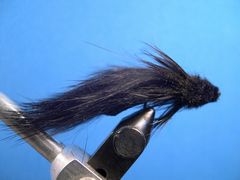 The Woolhead LeechLeech patterns are effective for both warm and coldwater gamefish. This little Leech was originally designed with black bass and slab-sized bluegills in mind, but it's also effective on other gamefish, especially stillwater trout. Materials List
Tying NotesLeeches vary in color from black to various shades of brown, olive, and gray. Black seems to be the most popular color for Leech imitations. Leeches range from less than two-inches up to six-inches in length. Many are in the two to three-inch range. The leech pattern in the tying sequence is about two and one-half inches long. 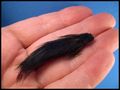 Leeches are wide and fairly flat as they swim in a smooth undulating up-and-down motion. They swim fairly slow -- about a foot every few seconds. Lead wire is optional, but adding eight to ten wraps of .025 lead wire at the front of the hook helps sink the leech to the bottom one-third of the water column where most leeches swim. Angling TipsEven though the Woolhead Leech is made of water absorbant materials, it sinks slowly. Without weight it tracks nicely on a floating line about two-feet below the surface. Those who are in the know claim that leeches swim near the bottom in lakes, ponds, and streams. In fact they have suction cups that hold them to rocks and other bottom structure.  Because leeches swim near the bottom I prefer to weight them with .025 lead wire and fish them on a ten-foot sink-tip line that has been cut back to five-feet. If you fish a weighted leech on a floating fly line you might want to add a split shot at the junction between the leader and the fly. The added weight will help get the fly down quicker. Once the Woolhead Leech is where you want it, fish it with a slow strip-strip-strip retrieve. Remember that leeches are slow swimmers, swimming only a foot or so every few seconds. Having said that, don't hesitate to tie and fish the little guy without the benefit of lead. If you can wait long enough for it to sink to the right depth you will find that it swims more naturally and it's easier to fish at a slow strip-strip rate. Tying Instructions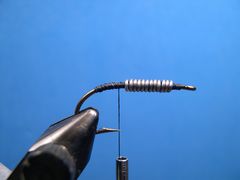 Step 1 Clamp the hook in the vice and crimp the barb. Lay down a base of thread from the hook's eye to the hook's bend. Start lead wire slightly forward of the hook's point and wrap the lead forward 8 to 10 turns. 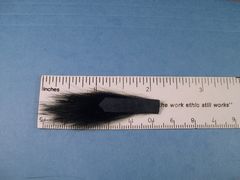 Step 2 Cut a piece of Zonker Strip to a length of two and one-quarter inches from the tip of the fur to the point where you cut the piece from the strip. Note that the hide has been trimmed to a point on the tail- end and trimmed square on the front end. 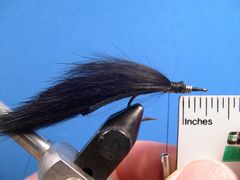 Step 3 Attach the Zonker Strip so that the front of the hide is exactly one-quarter inch from the front of the hook's eye. 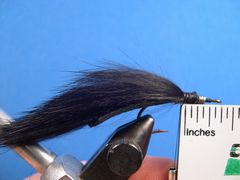 Step 4 Bind the Zonker Strip down with close and tight thread wraps with the hanging thread ending up exactly three-eighths inch from the front of the hook's eye. 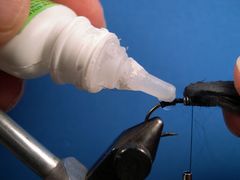 Step 5 Glue the Zonker Strip to the hook's shank with Zap-A-Gap. Move the strip out of the way to expose the thread wraps at the rear of the hook, add the glue to those thread wraps, and glue the hide to them. 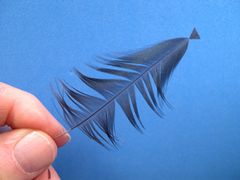 Step 6 Remove a fairly wide and webby feather from a hen neck and prepare it for tying in as the skirt of the fly. Strip away the fuzz at the base of the stem, stroke back the fibers, and prepare a tie-in point at the tip of the feather. 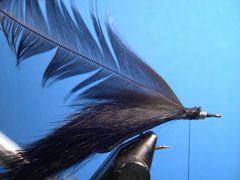 Step 7 Tie in the feather by the tip "wet fly style" with the concave side facing the hook. 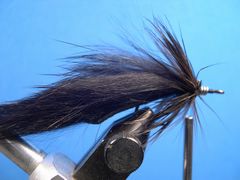 Step 8 Wrap the feather forward covering all of the existing thread wraps. Tie off the feather and remove the excess. 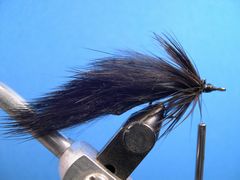 Step 9 Cover the exposed lead wraps and the remainder of the hook's shank with thread in preparation for building the wool head. The thread should end up hanging slightly forward of the hackle skirt awaiting the first clump of wool. 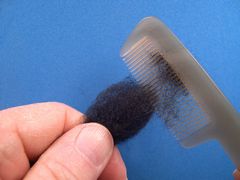 Step 10 Cut a reasonable sized clump of lambs wool from the hide and comb it to straighten the wool and remove any tangles. 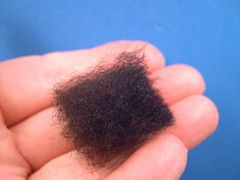 Step 11 After the wool has been combed, trim both ends so that you end up with a clump an inch or so long. 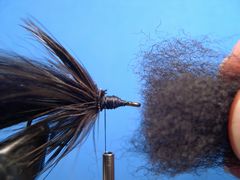 Step 12 Center the clump of wool at the hook's eye and push it to the rear until the hook is surrounded by wool and the clump is centered over the hanging thread. 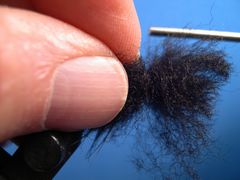 Step 13 Hold the wool tightly with the thumb and index finger of your left hand. Take two soft turns of thread - one directly on top of the other - and tighten the thread by pulling straight down. Don't let the wool spin on the hook's shank. 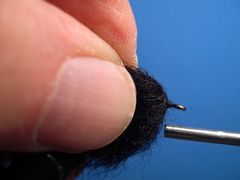 Step 14 Stroke the wool back with your left hand, pull the thread through the wool and take a couple of tight turns of thread against the base of the wool. 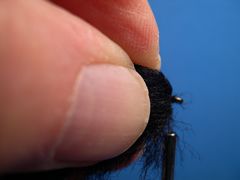 Step 15 Repeat the same process with a second clump of wool and tie off the thread in preparation for trimming the head to shape. 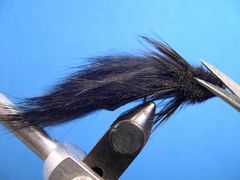 Step 16 Remove the fly from the vice and rough trim the head to shape. Begin with the belly and proceed to the sides and top. A serrated curved scissors works best for this job. If you have a rotary vice, put the fly back in the vice and finish the trimming process. The vice lets you free up your left hand to seperate the wool from the hackle skirt while you complete the trimming process. Step 17 Congratulations! Your Woolhead Leech is complete.
Warmwater Fly Tyer - by Ward Bean
© Copyright 2026 Ward Bean, Council Bluffs, IA, All rights reserved. © Copyright 2026 Ward Bean, Council Bluffs, IA, All rights reserved.
|