Swimming Flies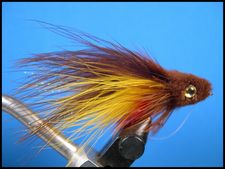 Woolhead Muddler - BrownThe Brown Woolhead Muddler is one of six minnows in the Woolhead Muddler Series. The other patterns are; Baby Bluegill, Baby Bass, Chartreuse, White, and Black. Materials List
Tying NotesHere is how I tie the Brown Woolhead on a size 4 Mustad 3366 hook. Angling TipsDepending on fishing conditions, I fish my woolheads three ways. Sometimes I use a floating line without any weight. Woolheads fished on a weight-forward floating line will track on or just below the water's surface until they become thoroughly soaked. Other times I use a floating line with a split-shot on the leader directly in front of the Woolhead. There are other times when a sink-tip line seems to work best. Tying Instructions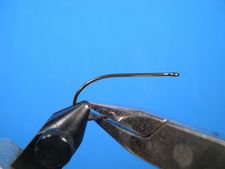 Step 1 Clamp the hook in the vice and flatten the hook's barb with needle nose pliers. 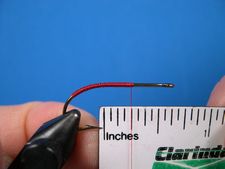 Step 2 Attach the 8/0 thread at mid-shank. Lay down a thread base slightly down the hook bend. Reverse the thread and make tight wraps of thread back to 1/4" from the hook eye. Measure if you're not sure. I do. As you can see in the photo, the thread wraps should end up half-way between the hook point and the hooks eye. 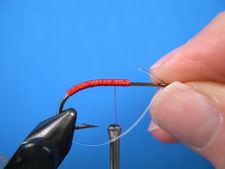 Step 3 Clip a three-inch piece of Mason Hard Mono and align the front of the guard material with the front of the thread wraps. Lash the guard material to the shank, completely covering it and the existing thread base with thread wraps. Size the weedguard now so you won't have to size it later by inserting the tag end through the hook eye, adjust it to size, and kink it. Flatten the kink with needle nose pliers and cut off any excess leaving a 1/4" of mono in front of the kink. 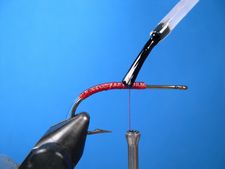 Step 4 Return the thread to the hook point and coat the thread base with Dave's Flexament thinned almost to the consistency of water.  Step 5 To build the tail select a red marabou feather and stroke the fronds back toward the base of the stem to expose the feather tip. Cut out the tip and about an inch of stem.  Step 6 Stroke the fronds forward and trim the butts so that the bunch of fronds is the length of the hook. Align the trimmed butts with the front of the weedguard and bind the tail down with close tight thread wraps from the front of the weedguard back to the hook bend. Return the thread to the hook point.  Step 7 To build the wing, select a yellow marabou feather. Prepare it in the same manner that you prepared the red feather but this time remove about about one and one-half inch of the tip and stem. Trim the butts so that the bunch of marabou is about one and one-half inches long. Align the butts with the front of the weedguard and tie them in with close tight thread wraps from the front of the weedguard almost back to the base of the red tail.  Step 8 Tie in eight strands or so of Crystal Flash or Rainbow Thread so that the strands fan out over the top of the marabou. Step 9 Prepare another yellow marabou feather in the same way that you prepared the first one by removing about one and one-half inch of the stem. Trim the butts so that this bunch of marabou will be slightly longer than the the first bunch of marabou when it's tied in. That way the wing on the finished fly won't look like a paint brush. Align the butts with the front of the thread wraps and wrap back with close tight wraps almost to the base of the first bunch of white marabou. Then tie in eight or so strands of flash material in the same way that you tied them in in step 8.  Step 10 Select a Brown marabou feather and prepare it in the same manner as you did the other marabou feathers by removing about one and one-half inch of the stem. Trim the butts so that the brown marabou will be slightly longer than the yellow when it's tied in. This helps elimate the paint brush effect on the wing. Align the butts of the brown marabou with the front of the thread wraps and wrap back with close tight wraps almost to the base of the last bunch of yellow marabou. Coat the thread wraps with Dave's Flexament thinned almost to the consistency of water. 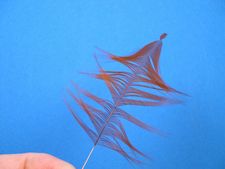 Step 11 To tie in the skirt select a fairly wide brown hen neck feather, remove the fluff, stroke the fronds back, and prepare the tip as shown in the photo. 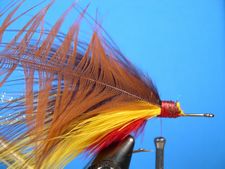 Step 12 Tie the feather in by the tip directly in front of the wing with the curved side facing the hook. 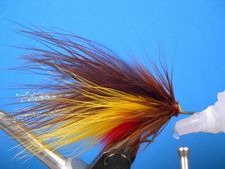 Step 13 Wrap the feather forward wet fly style. You may need to use a second feather to complete the skirt by covering all of the thread wraps. Tie off the thread with a Zap-A-Gap knot by coating an inch or so of the thread nearest the hook. Then take four or five wraps of the wet thread on top of the existing thread wraps. The glue dries almost instantly. Remove the thread and you're finished with the tail and wing.  Step 14 To begin to build the wool head, start the brown 6/0 thread at the hook eye and cover the hook shank with thread wraps back to the front of the weedguard. The thread should end up slightly forward of the skirt. 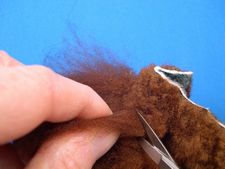 Step 15 Cut a clump of wool from the base of the hide.  Step 16 Comb out the tangles.  Step 17 Trim both ends so that you end up with a clump of wool about one inch long.  Step 18 Center the clump of wool at the eye of the hook and gently push the wool back until it's centered over the hanging thread.  Step 19 Tie the wool to the shank by making two loose wraps of thread directly on top of each other. Holding the wool tightly to the hook with the thumb and fingers of your left hand tighten the thread by pulling straight down making sure that the wool doesn't spin on the shank. 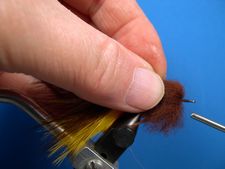 Step 20 Pull the thread through the wool. 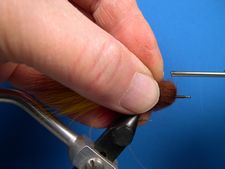 Step 21 Take several tight wraps of thread at the base. 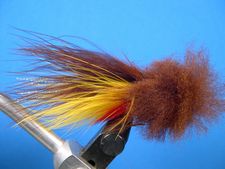 Step 22 Move the thread forward a couple of turns and prepare and tie in another clump of wool just as you did in steps 15 through 21. Tie off the wool head with a couple of half-hitches and remove the thread. The wool is ready to be trimmed. It looks scuffy, but not for long. 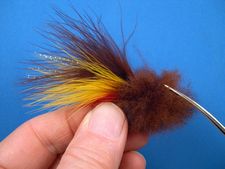 Step 23 Remove the fly from the vice and began to trim it with curved scissors. With small snipps, start at the top and move to the sides and findally to the bottom.. 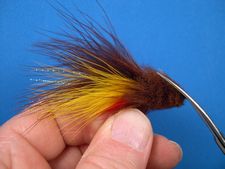 Step 24 Keep trimming until you have a fairly well defined minnow shaped head. 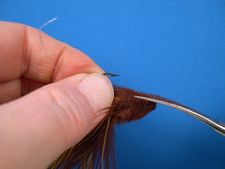 Step 25 As your're trimming the head, make sure that the bottom of the head is fairly flat leaving enough clearance between the hook point and the head. 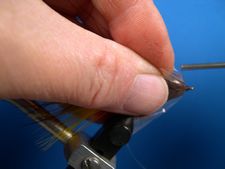 Step 26 Return the fly to the vice to tie off the weedguard. Poke a hole with your scissors tip in a one-inch square piece of plastic bag and push the hook eye through the hole. Attach the 6/0 brown thread and wrap back against the plastic. Insert the tag end of the weedguard through the hook's eye and take a couple turns of thread to bind it down. 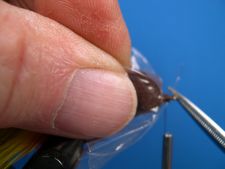 Step 27 Adjust the guard and trim the tip flush with the front of the hook eye. 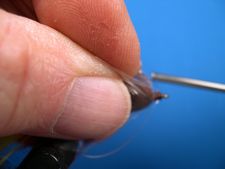 Step 28 Catch the tip with the thread and bind it down. Form a neat head and tie off the thread with a couple of half hitches. Remove the piece of plastic bag by slitting it with the tip of your scissors. 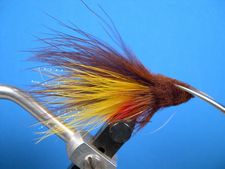 Step 29 Do the final trim until you are satisfied with the shape of the head. The head in the photo suits me. 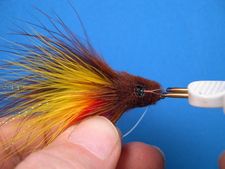 Step 30 Remove the fly from the vice and burn eye sockets with a burning point or cut them with the tips of your scissors. I prefer a burning point as shown in the photo. 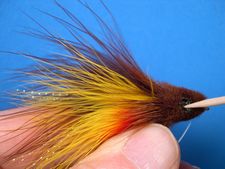 Step 31 Scrape the burned hair out of the sockets with the tip of a round tooth pick which you will use again to help glue in the eyes.  Sstep 32 Add Dave's Flexament to each eye socket.  Step 33 Using the round toothpick put a dollop of Household Goop in each eye socket. Household Goop can be purchased at any hardware store or home center.  Step 34 Pop an appropriately sized molded plastic eye in each eye socket.  Step 35 Your Woolhead Muddler is finished.
Warmwater Fly Tyer - by Ward Bean
© Copyright 2026 Ward Bean, Council Bluffs, IA, All rights reserved. © Copyright 2026 Ward Bean, Council Bluffs, IA, All rights reserved.
|