Wet Flies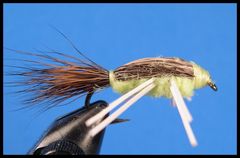 The Gill GetterThe Gill Getter is one of Florida angler Tom Lentz's favoritie fly patterns for big bluegills that hang out around ledges, pilings, and deep drop-offs. Materials List
Tying NotesThe Gill Getter is a pretty straight forward tie. But, there are a couple of testy moves. One is wrapping the chenille body without the rubber legs getting in the way and the other is attaching the thread at the rear of the hook to bind down the moose mane tail. Hopefully, the photos in the tying sequence will help. I like to tie my Gill Getters on a Mustad 3906B 1X long wet fly hook but the Mustad 9671 2X long nymph hook in size 10 also works well. I prefer .015 lead wire for weight. If you want your fly to sink faster there's no problem stepping up to the next size lead wire. The fly is much more durable if you paint the shellback and head with Dave's Flexament thinned to the consistency of water. If you're not familiar with Dave's Flexament or how to thin it, click on "Cements." Angling TipsAccording to the authors of "Flies for Bass and Panfish" the Gill Getter was designed as a nymph to be fished deep and slow in and around structure. Many of the ponds and small lakes in my neck of the woods have drowned timber and I have had good luck chucking the Gill Getter at standing trees. Hopefully, I hit the tree so the fly drops into the water and follows the tree trunk down into the depths. Often times the Gills hanging around the tree take the fly on the drop. That's one reason why I don't weight it any more than I do. I want the fly to drop slowly, not like a rock. Attach the Gill Getter to your tippet with a Duncan Loop or a Non-Slip Mono Loop knot. Doing so allows the fly to move freely giving it a more life-like appearance and action. If you're not familiar with Duncan or Mono Loops click on "Knots." Tying Instructions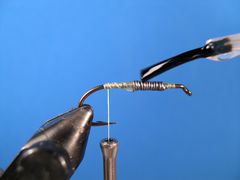 Step 1 Clamp the hook in the vice and crimp the barb. Start the thread at the hook's eye and lay down a base of thread from the eye to the hook's bend and back. Make 10 or 12 wraps of .015 lead wire in the center of the hook's shank. Coat the thread and the lead with Dave's Flexament thinned almost to the consistency of water. 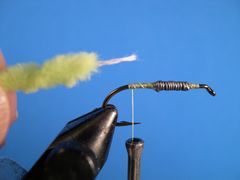 Step 2 Prepare a three-inch piece of Chenille by stripping some of the chenille away from the core with your fingernails. 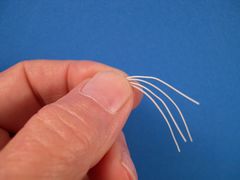 Step 3 Next, prepare four strands of rubber, each about two-inches long, for the legs. 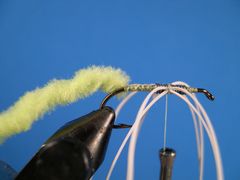 Step 4 First, tie in the chenille at the bend of the hook by binding down the chenille's core to the hook's shank. Next, move the thread to the center of the hook's shank and tie in a pair of rubber legs "Madame X" style on the far side of the hook. Repeat the process with the pair of legs for the near side of the hook. 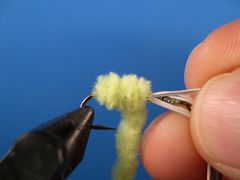 Step 5 Pull the legs out of the way with your right hand as shown in the photo and wrap the chenille forward with your left. 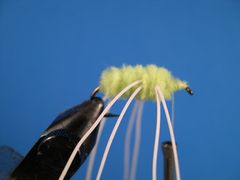 Step 6 Take one turn of the chenille between the legs then switch hands and hold the rubber legs out of the way with your left while you wrap the chennile forward with your right hand. Tie off the chenille and remove the excess. Then, bind down the end of the chenille in preparation for adding the Moose Mane shellback and tail. Note the amount of room left behind the eye. Room needed to form the fairly large head later. 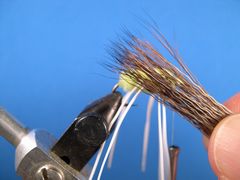 Step 7 Clip a soda straw size bunch of hair from a piece of Moose Mane, remove the underfur, and even the hair tips in a stacker. 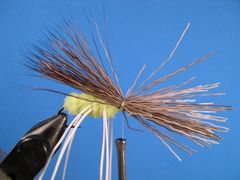 Sstep 8 Bind the Moose Mane to the hook with several tight wraps of thread as shown. The tips will form the tail of the fly and they should extend beyond the bend by about the length of the hook. 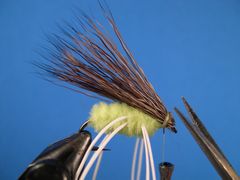 Step 9 Trim the Moose Mane butts as shown. Now you can see why you needed to leave ample room at the eye to form the head. 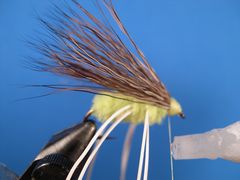 Step 10 Finish forming the head and tie it off with a Zap-A-Gap Knot. Simply coat about one-inch of the thread nearest the hook with the glue and wrap the wet thread on top of the existing thread wraps. The glue dries almost instantly. Remove the thread after the glue dries. 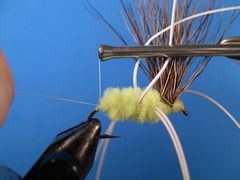 Step 11 Move the Moose Mane and the rubber legs out of the way as shown and re-attach the tying thread at the bend of the hook with a jam knot. 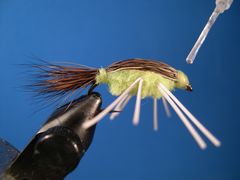 Step 12 Stroke the Moose Mane to the rear to form the shellback and tail and bind it down with several wraps of thread. Tie off the thread with a Zap-A-Gap Knot just as you did in step 10. Next, trim the legs to an appropriate length and paint the shellback and the head with Dave's Flexament to provide duribility to the fly. 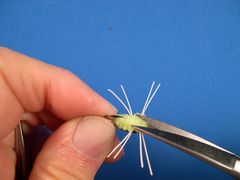 Step 13 This last step isn't necessary but I think that it makes the bug look more natural. Trim the belly with you curved scissors so that it tapers from the head back to the tail. 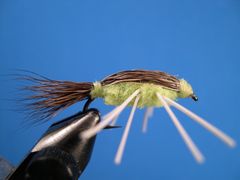 Step 14 Your Gill Getter is finished.
Warmwater Fly Tyer - by Ward Bean
© Copyright 2026 Ward Bean, Council Bluffs, IA, All rights reserved. © Copyright 2026 Ward Bean, Council Bluffs, IA, All rights reserved.
|