Wet Flies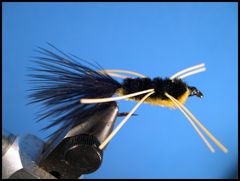 Panfish PolecatThe recipe and a great photo of the Panfish Polecat can be found in "Flies for Bass and Panfish" but the instructions for tying it are not included. Here is the way I tie the Panfish Polecat. Materials List
Tying NotesThis fly is one of three flies that Florida Warmwater Angler Tom Lentz calls his big three Brim Flies. The others are the Gill Getter and the Brim Fly - Gray. The Panfish Polecat in the tying tutorial is tied on a size 8 hook using medium chenille for the body. I sometimes use smaller hooks for smaller flies with small or fine diameter chenille for the body.  The Panfish Polecat featured in "Flies for Bass and Panfish" has a yellow tail, yellow belly, and a black back with white legs. The Panfish Polecat in this tutorial has a black tail, yellow belly, and black back with yellow legs. Both are very effective. I think that's because the contrasting colors of black and yellow materials are very appealing to most panfish. I have also used black legs on both color variations but contrasting yellow or white legs seem to have more appeal. I like to use Whiting Chickabou sometimes called mini-marabou for marabou tails on small flies. But, regular Marabou Bloods work just fine. Whiting Farms offers a product called Chickabou that works great. Contact Whiting Farms for a dealer or catalog store that carries Chickabou at: Chenille comes wrapped around cardboard cards and often times the piece you want to use is crushed and kinked. A surefire way to bring it back to shape is to steam it. To find out more about this and other chenille tying tips click on: Angling Tips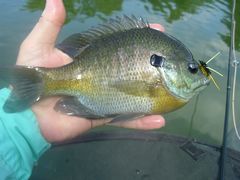
Polecat at work This little "nymph type" fly fishes well throughout the season. It's best fished slow with a strip-strip-pause retrieve. The takes can be very light so set the hook at the slightest hint of tension on the line. I like to fish it parallel to weed lines early in the morning or in late afternoon. I try to fish it as close as possible to the weedline without snagging. But, don't hesitate to fish the fly in other places that may be holding some big bluegills. Like all of my warmwater flies I attach the Panfish Polecat to the tippit with a Duncan or Non-Slip Mono Loop Knot to give it life-like action. If you're not familiar with these knots click on warmwater knots to learn more. Tying Instructions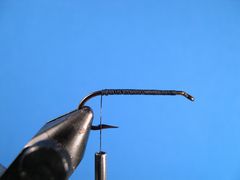 Step 1 Clamp the hook in the vice and crimp the barb. Attach the tying thread at the hook's eye and lay down a base of thread from the eye to the hook's bend. 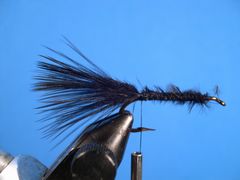 Step 2 Attach the marabou tail as shown in the photo. The tail's length should be about as long as the hook's shank. 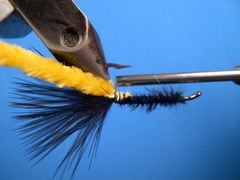 Step 3 Turn the fly over and attach a piece of yellow chenille, at the tie in point ahead of the tail, on the bottom of the hook's shank. 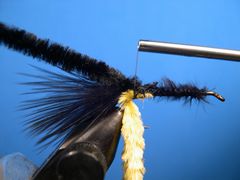 Step 4 Turn the fly upright and repeat the process with a piece of black chenille. 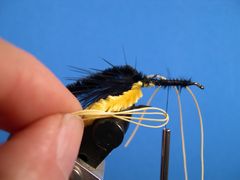 Step 5 Move the thread to slightly past the center point on the hook's shank. Prepare two sets of rubber legs with each set containing two strands of rubber about two-inches long. Tie in one set on the far side of the hook and one set on the near side. To tie them in the way I do wrap the rubber strands around the thread as shown and proceed to the next step. 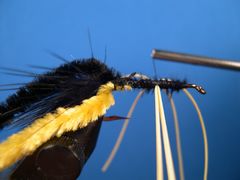 Step 6 Pull the strands with your left hand while holding the bobbin tight with your right hand so there is resistance against the thread and move the thread to the position on the shank where you lock the legs in place. Take and couple turns of tight thread and the legs are locked in. 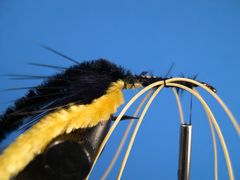 Step 7 After the legs are in place move the thread to the front of the hook in preparation for building the body. The thread should be at least one eye width behind the eye. 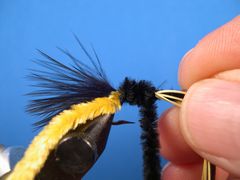 Step 8 Move the legs out of the way with your right hand and begin wrapping the black chenille with you left hand. 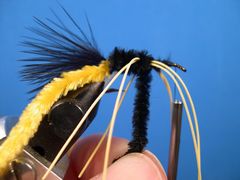 Step 9 Wrap the chenille up to the base of the legs and then take one turn of chenille between the legs. Make sure that the legs don't get caught up in the chenille. 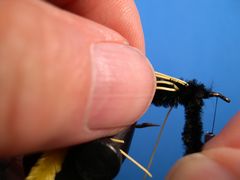 Step 10 To finish wrapping the chenille body hold the legs out of the way with your left hand and wrap the chenille forward with your right hand. 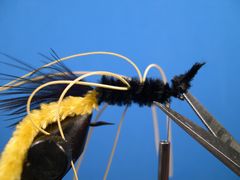 Step 11 Bind down the chenille with your tying thread. Carefully remove the excess chenille with the scissor tips.  Step 12 Pull the yellow chenille forward as shown and bind it down with a couple of tight thread wraps and a half-hitch. Carefully remove the excess chenille with your scissors tips as you did before. Be sure that you don't accidently clip the tying thread in the process. 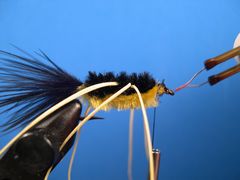 Step 13 There's a good chance that the chenille crowding the eye. Use your Burning Point as shown to clean out the eye. Once that's done form a neat thread head and tie off the thread. 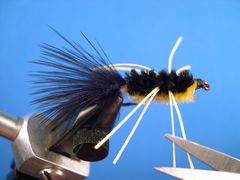 Step 14 Trim the rubber legs to a length that suits you. I like them to be a half-inch or so long. 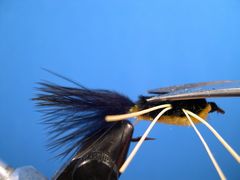 Step 15 Trim the back and belly so that the body slightly tapers from the head to the tail. 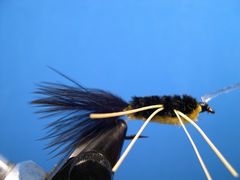 Step 16 Paint the head with head cement. I use Sally Hansen's "Hard As Nails" nail polish. 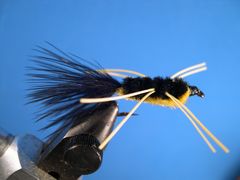 Step 17 Your Panfish Polecat is finished.
Warmwater Fly Tyer - by Ward Bean
© Copyright 2026 Ward Bean, Council Bluffs, IA, All rights reserved. © Copyright 2026 Ward Bean, Council Bluffs, IA, All rights reserved.
|