Wet Flies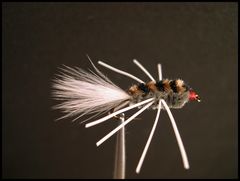 The Brim FlyThe Brim Fly is the third fly in a group of wet flies that Florida Angler Tom Lentz call his "Big Three" bluegill flies. The others are the Panfish Polecat and the Gill Getter. Materials List
Tying NotesThere are a number of things you should know about working with chenille if you want your chenille bodied flies to look great. For instance, be sure to steam the chenille to bring it back to its original shape. Click on "Tying With Chenille" for other tying tips before you begin tying the Brim Fly. You won't be sorry! Adding 10 or 12 turns of .015 lead is optional depending on how fast you want the fly to sink and how deep you want to fish it. I tie some with and some without lead. You should too. Angling TipsBe sure to attach the Brim Fly to your leader with a Duncan or Non-Slip Mono Loop to give it maximum action. If you're not familiar with those knots click on "Warmwater Knot." 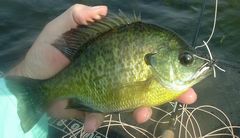
The Brim Fly at work. Fish the fly near structure - weeds, wood, drop-offs, points, etc. with a strip-strip-pause retrieve. If the fly is weighted, fish it fairly fast. If it's unweighted, fish is fairly slow. 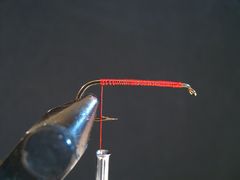 Step 1 Clamp the hook in the vice and crimp the barb. Start the thread behind the hook's eye as shown and lay down a thread base from that point to the hook's bend. 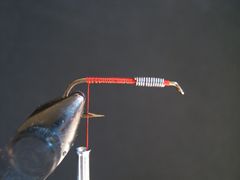 Step 2 Wrap 10 to 15 wraps of .015 lead wire on the hook's shank. The lead wraps should be placed slightly forward of the center of the shank. 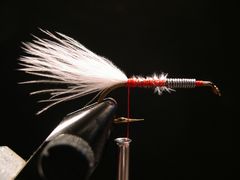 Step 3 Attach a clump of marabou tips by binding the tips down from the hook's bend to the the lead wraps. The marabou tail should extend approximately a hooks length beyond the hook's bend. 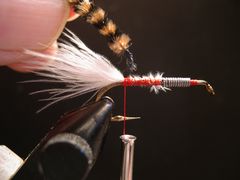 Step 4 Prepare a piece of Black and Brown Variegated Chenille by stripping away about 1/8th inch of fuzz from the core and attach it to the top of the hook's shank directly in front of the tail. 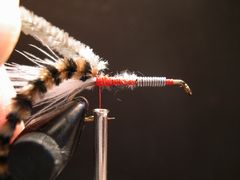 Step 5 Repeat the same procedure with a piece of gray chenille tying it in directly on top of the variegated chenille. 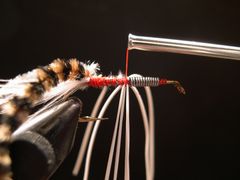 Step 6 Prepare two sets of rubber legs with two strands of rubber in each set. Make sure that the rubber strands are about 2 1/2 inches long. Bind one set to the far side of the hook as shown and one set to the near side. The legs should be placed slightly forward of the center of the hook's shank. 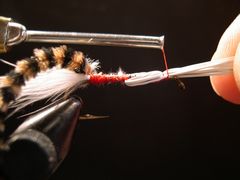 Step 7 Gather the rubber strands, pull them forward, and hold them down at the hook's eye with a couple turns of thread. This move will keep the legs out of the way while you're wrapping the chenille. 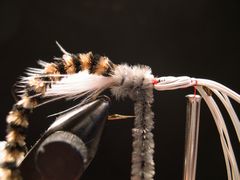 Step 8 Wrap the grey chenille forward stroking back each wrap of chenille with the thumb and index finger of your left hand as you wrap the chenille forward with you right hand. 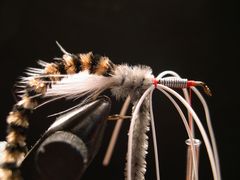 Step 9 Release the legs so they can resume their position on the hook's shank. 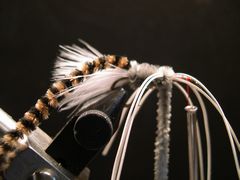 Step 10 Take one turn of chenille between the legs as shown. Be sure you have an equal number of legs on each side of the chenille. 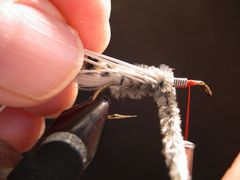 Step 11 Continue wrapping the chenille forward to the front of the hook. Be sure to stroke the chenille and the rubber legs back with the fingers of your left hand as you wrap forward with your right hand. 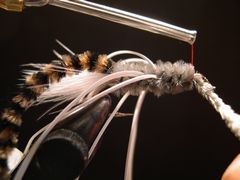 Step 12 Tie off the gray chenille and remove any excess material. Be sure to leave enough room behind the eye to tie off the shellback and form a neat thread head. 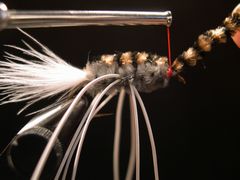 Step 13 Pull the variegated brown and black chenille forward to from the shellback and tie it off. Remove any excess material. 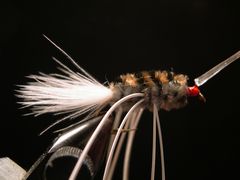 Step 14 Form a neat thread head and tie off the thread. Apply head cement. I'm using Sally Hansen's "Hard As Nails" nail polish. It's the best there is! 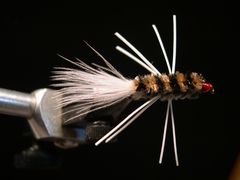 Step 15 Trim the legs to a length that suits you. I like them to be about one-half inch long. 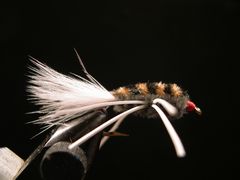 Step 16 Your Brim Fly is finished.
Warmwater Fly Tyer - by Ward Bean
© Copyright 2026 Ward Bean, Council Bluffs, IA, All rights reserved. © Copyright 2026 Ward Bean, Council Bluffs, IA, All rights reserved.
|