Wet Flies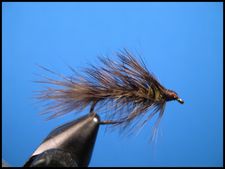 Brim BugI tie the Brim Bug in Brown Grizzly, Olive Grizzly, Natural Grizzly, and Black but I don't think that color is as important as the bugs profile. Materials List
Tying NotesThe Brim Bug is quite small. The one in the tying sequence is one inch long. If you substitute another hook for the Mustad 3906B choose a 1X long wet fly hook. If possible, don't substitute any other dubbing mterial for Hare-Tron. When you brush the fly (step 8) the antron fibers marry with the feather barbuels to give the fly a buggier look. I tie Brim Bugs both weighted and unweighted and switch between flies depending upon fishing conditions. If you haven't used Whitting Bugger or Chickabou Feathers you're missing a good thing. To find out more about Whiting fly tying feathers, a Whiting dealer near you or a mail-order source for Whiting products, click on: Angling TipsI fish a weighted Brim Bug in the early spring and late fall when the fish are in deeper water. During late spring and summer, in the morning and late afternoon, when bluegills are in shallower water I fish an unweighted Brim Bug attached to a floating line with a non-slip mono knot or a Duncan Knot. On bright summer days and during the heat of the day, when the gills move to deeper water, I switch to a 5 foot sink-tip. Tying Instructions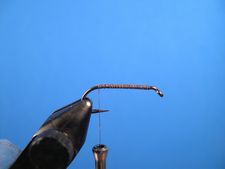 Step 1 Clamp the hook in the vice and crimp the barb. Start the thread behind the hook's eye and cover the shank with thread back to the hook's bend. 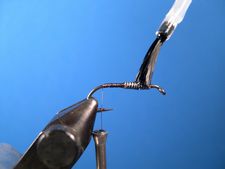 Step 2 Place ten wraps of lead wire at the front of the hook and coat it with Dave's Flexament thinned almost to the consistency of water. 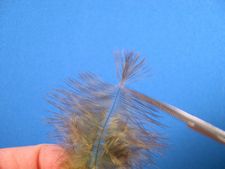 Step 3 Select a well marked Chickabou (mini-marabou) feather and prepare it by stroking back the fronds and removing about one-quarter inch of the tip. 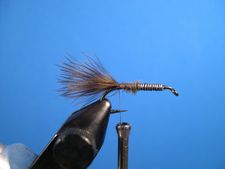 Step 4 Tie in the Chickabou tail. It should be about 3/8th inch long. 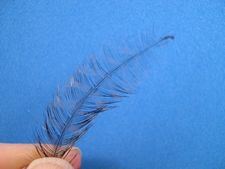 Step 5 Select an appropriate Bugger Feather. The barb length is critical. Check the photo of the finished fly to get an idea of barb length in relation to the bugs profile. Prepare the feather by removing the fluff from the base of the stem, stroking back the fronds, and preparing the tip for tie in. 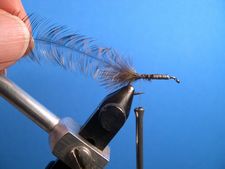 Step 6 Tie in the feather by the tip at the base of the tail with the curved side facing the hook. 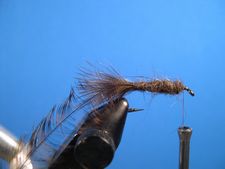 Step 7 Apply a thin noodle of dubbing to the thread and make a tapered body from the rear to the front of the fly. 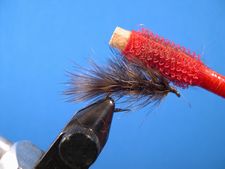 Step 8 Wrap the Bugger Feather, wet fly style, up the shank with fairly close wraps of the feather. Tie off the feather and form a neat thread head. When you're satisfied with the thread head, remove the thread. Brush the fly vigorously with a Whitlock Dubbing Brush. Brush until the antron fibers in the dubbing marry with the feather to give the fly a buggy look. To learn how to make a Whitlock Dubbing Brush go to the Tier's Bench page. 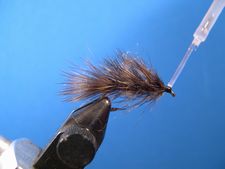 Step 9 Paint the head with head cement. I use "Hard As Nails" nail polish. I think that it's better than any head cement on the market. And, a lot of other tiers think so too. The nail polish brush is an easy and precise way to apply head cement. Check out the Tier's Bench page to see how to reduce the size of the nail polish brush. 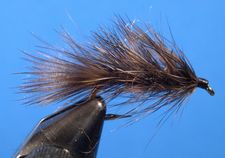 Step 10 Your Brim Bug is finished. I hope that you catch as many fish with it as I do.
Warmwater Fly Tyer - by Ward Bean
© Copyright 2026 Ward Bean, Council Bluffs, IA, All rights reserved. © Copyright 2026 Ward Bean, Council Bluffs, IA, All rights reserved.
|