Wet Flies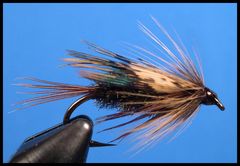 CockarooThe Cockaroo wet fly, so named because it's tail and wing come from a rooster Ringneck Pheasant, is one of my favorite panfish flies. Bluegills, especially love to eat this chubby little critter. Materials List
Tying NotesI tie the Cockaroo in three sizes -- 8, 10, and 12. The Cockaroo in the tying sequence is a size 8. Of all the body parts, the tail and the wing are constants. Choosing other materials for the remaining parts; the underbody, body, and collar are up to you. I often substitute Arizona Synthetic Peacock Bronze Dubbing or Peacock Life Cycle Dubbing for the Peacock herl body. I even use Ringneck Pheasant center tail fibers for the body on the smaller hooks in the same way that they are used on a Phasent Tail Nymph. On traditional wet flies the collar (hackel) is tied in before the wing. On Salmon Wet Flies the collar is the last part to go on. I put the collar on last to make the fly look more alive in the water. The more moving parts the better. Angling TipsI switch between a strip-pause retrieve and figure-eight hand-twist retrieve with wet flies in still water. I always attach any fly, that I'm fishing in ponds or lakes, to the leader with a Duncan Knot or non-slip mono knot. All flies, especially top water flies, have much more movement when an open knot is employed. Tying Instructions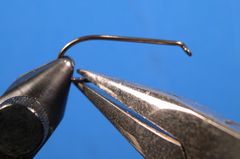 Step 1 Clamp a size 8 hook in the vice and crimp the barb. 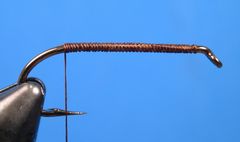 Step 2 Start the thread at the hook's eye and cover the shank with thread back to the hook's bend. 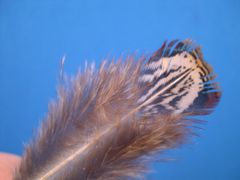 Step 3 Select a feather from a Chinese Ringneck Pheasant rump patch. 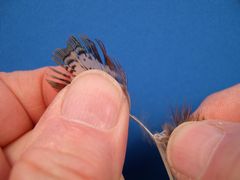 Step 4 Remove the fluff from the base of the stem. 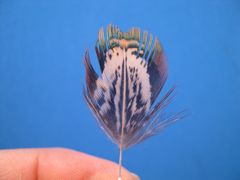 Step 5 This is the way the rump feather should look after the fluff has been removed. 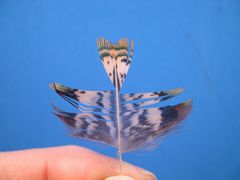 Step 6 Stroke back the barbs to expose the feather tip as shown. 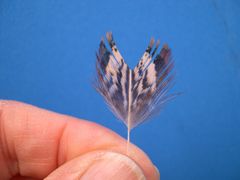 Step 7 Remove the tip with your scissors so the feather looks like this. Lay the feather aside for use as the wing later. 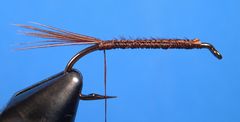 Step 8 Tie in the tip that you just removed from the rump feather in step 7 for the tail. Leave the thread hanging at the tie in point. 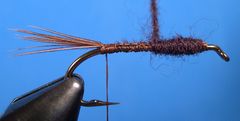 Step 9 Put a spool of dark brown Uni-Yarn in a bobbin. Start the Uni-Yarn at the front of the hook in the same way that you started the tying thread and build an underbody that tapers slightly from front to back. 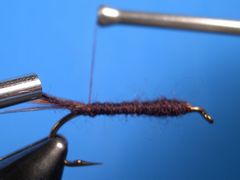 Step 10 When you are satisfied with the tapered body, tie off the Uni-Yarn with the tying thread.  Step 11 Select two peacock herls from a peacock stick, even them, and trim their tips and butts. If you don't have one you can substitute strung peacock herl. Tie the peacock herls in by there tips. 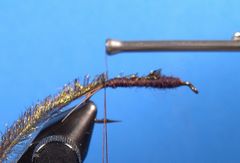 Step 12 Make a herl rope by marrying the two strands of herl with the tying thread. Pull the tying thread toward you until the thread is a bit longer than the peacock herls. Pass the thread over the index finger of your left hand to form a loop and return to the tie in point for the herl. Lock the loop in place with a couple of turns of thread and move the tread to the front of the hook. You should have a loop of thread at the herl tie in point that is a little longer than the herl. Align the herl with the thread loop and grasp the ends of the herl and the thread loop with a hackle pliers. You now have a herl rope. Twist the herl rope a couple of times and begin to wrap the rope up the hook shank. Keep twisting as you wrap. The thread, imbedded between the two herls, makes the herl rope. 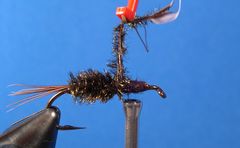 Step 13 Wrap the herl rope forward twisting the rope two or three times as you make each wrap. 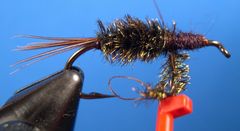 Step 14 Keep wrapping and twisting the rope until you can't wrap any further. That's slightly past the half -way point on a size 8 hook. Tie off the herl rope. Remove the excess in preparation to tie in another herl rope.  Step 15 To finish the body tie in two more herls as you did in step 11 and repeat the process that you followed in steps 11 through 14. 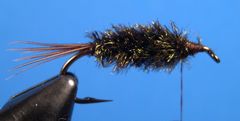 Step 16 Stop wrapping the herl rope about two eye widths from the hook's eye and remove any excess material. Step 17 Make a smooth tread base as shown in preparation for adding the wing and the collar. 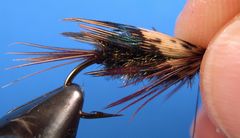 Step 18 Take the rump feather that you prepared in steps 3 through 7 and lay it on top of the hook with the feathr tips extending slightly over the tail. 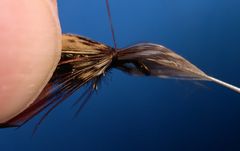 Step 19 Once you are satisfied with the placement and alignment of the rump feather, bind it down with three or four turns of thread. 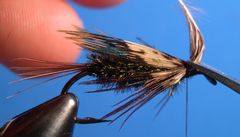 Step 20 Remove the excess stem with the tips of your scissors. 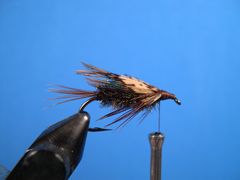 Step 21 This is the way the Cockaroo should look before the collar is attached. 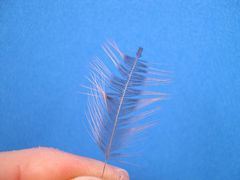 Step 22 Select an appropriate size hen neck feather and prepare it by stroking back the barbuels and preparing the tip as shown in the photo. The feather's barbs should reach the hook point. Measure the feather to determine the barb length. 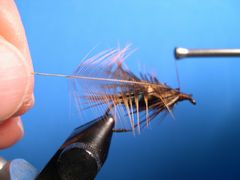 Step 23 Tie in the feather by the tip with the curved side facing the hook. Take three or four wraps, wet fly style, and tie off. Remove any excess material and make a thread head. 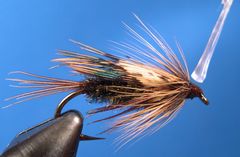 Step 24 Add head cement. I use "Hard As Nails" nail polish. It's great head cement. 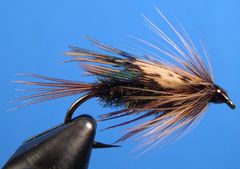 Step 25 The finished Cockaroo. Go fish it!
Warmwater Fly Tyer - by Ward Bean
© Copyright 2026 Ward Bean, Council Bluffs, IA, All rights reserved. © Copyright 2026 Ward Bean, Council Bluffs, IA, All rights reserved.
|