Bottom Flies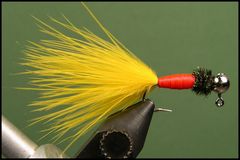 Crappie JigYou can tie this Jig in a variety of colors and fish it for a variety of fish. A jig can be one of the most deadly lures in you fly box. Materials List
Tying NotesThe Jig can be tied in any color or combinations of colors that you choose. The one constant is the Peacock Herl Thorax. I prefer to use Uni-Stretch Nylon for the abdomen but you could also use heavy thread or yarn. Danville also makes a stretch nylon in several colors. Stretch Nylon comes on a spool and it can be started on the hook's shank, with a jam knot, just like tying thread. 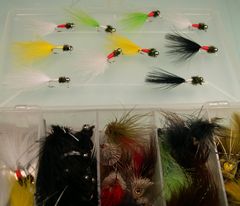 I prefer Ball Style Jig Heads with a Nickel head but you could use a plain head an paint it if you choose. I tie jigs, in both sizes, in a variety of colors. In addition to yellow, a jig with a white tail is great for crappies. Angling TipsI often fish jigs under a large strike indicator. I simply attach the jig at a length of two feet or so under the indicator. Fishing a jig under a strike indicator may be repugnant to you because it's a type of bobber fishing. But, it's an extremely effective way to catch fish. That's the only way a couple of my fly fishing friends fish a jig. And, they both catch lots of fish including: Crappies, Bluegills, Bass, Carp, Yellow and White Bass and Wipers. The tactic that sets this fishing method apart from the type of bobber fishing that non-flyfishers employ is that the jig is constantly moved with short strips and pauses or manipulation with the rod tip. Since you can see the strike indicator, you can determine how you are swimming the Jig by the way that you are moving the indicator.  Tying Steps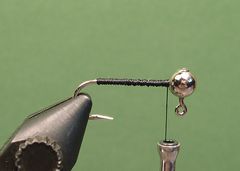 Step 1 Clamp the jig head in the vice and crimp the barb. Start the thread at the head and lay down a base of thread from the head to the hook's bend and back to the head. 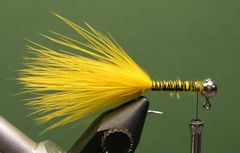 Step 2 Select a blood marabou feather for the tail and tie it in from the hook's head back to the hook's bend. 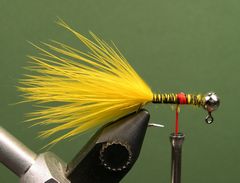 Step 3 Tie off the tying thread at the jig head. You will re-attach the tying thread later. Put a spool of red Uni-Stretch Nylon on a materials bobbin and attach the Uni-Stretch with a jam knot at the two-thirds point on the hook's shank. 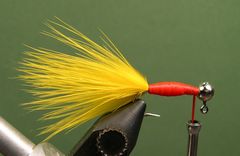 Step 4 Build an abdomen as shown and tie off the Stretch-Nylon at the head with a half-hitch. 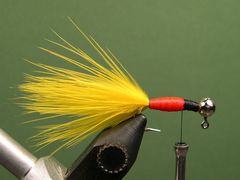 Step 5 Re-attach the tying thread an lay down a thread base for the Peacock Herl Thorax. 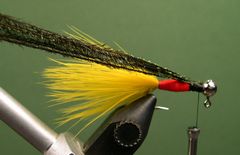 Step 6 Select several peacock herls (4 or 5) and trim the butts and tips of the herl. Tie in the herl by the tips as shown. 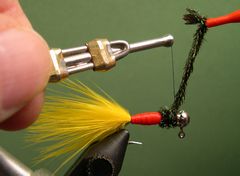 Step 7 Make a peacock herl rops by grasping the butts with a hackle pliers and wrap the herl forward to form the thorax. Tie off the herl with your tying thread and remove any excess herl. I use a Zap-A-Gap Knot to tie off the herl. Simply coat an inch or so of the thread nearest the hook with Zap-A-Gap and make a couple of wraps with the wet thread behind the jig head. 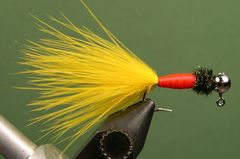 Step 8 Wait a moment or two for the Zap-A-Gap Knot to dry and clip the thread. Your Jig is ready to be fished.
Warmwater Fly Tyer - by Ward Bean
© Copyright 2026 Ward Bean, Council Bluffs, IA, All rights reserved. © Copyright 2026 Ward Bean, Council Bluffs, IA, All rights reserved.
|